Making a Captured Ring Tool
Make your own specialized tool just for this job

Step by step procedure
You asked and I'm (finally) doing it. I had several requests for a short article on how to make a captured ring tool as is pictured at the top of the "Turning a Captured Ring" article here. Personally, I don't like using these tools. I normally just use a skew of some sort. But, not everybody wants to learn that so a dedicated captured ring tool is certainly a good way to go when you want to make your own captured rings on the lathe. So, here we go ... a very easy way to make one of these tools yourself. Please note: This is just one way to do it. There are others. The best way for you to do it depends on the equipment you have to work with; the size of tool you're wanting to make; and whatever your skill or requirements are.
 |
Start with a skew (for those of you that know me or have seen me demonstrate or taken a class/workshop of mine know that phrase very well!) In this case, it's just a small rectangular skew. Unless you're making very large diameter rings, you don't need a very wide skew. This one is just a high-carbon junker I had laying around. Perfectly usable for this purpose. |
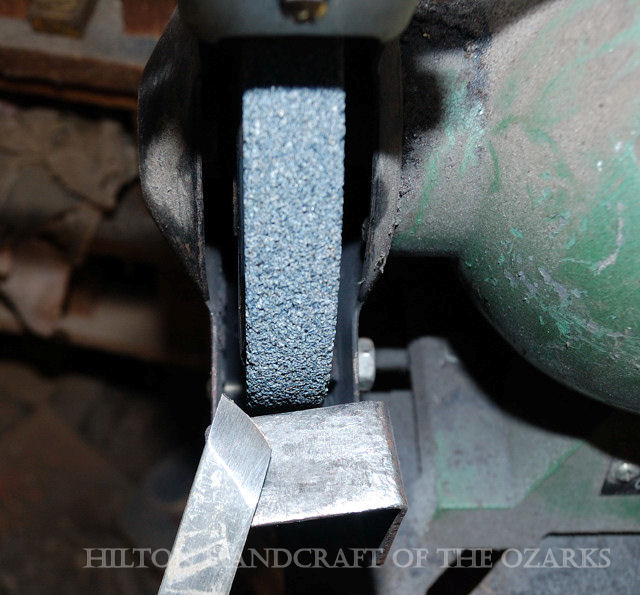 |
The first thing I do is take it to a grinder ... |
 |
And make a little nick or grove on the cutting edge of the skew. Just lightly touch the edge of the skew to the corner of the grinding wheel. Just enough to make a little trough. I do this so that the next step is easier. Make sure you don't go too far here. You don't want to make a nick that's larger than the half-round you're wanting to ultimately end up with. |
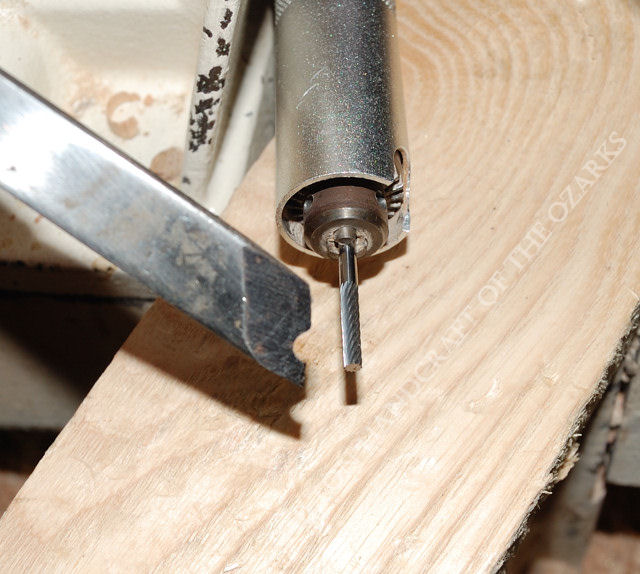 |
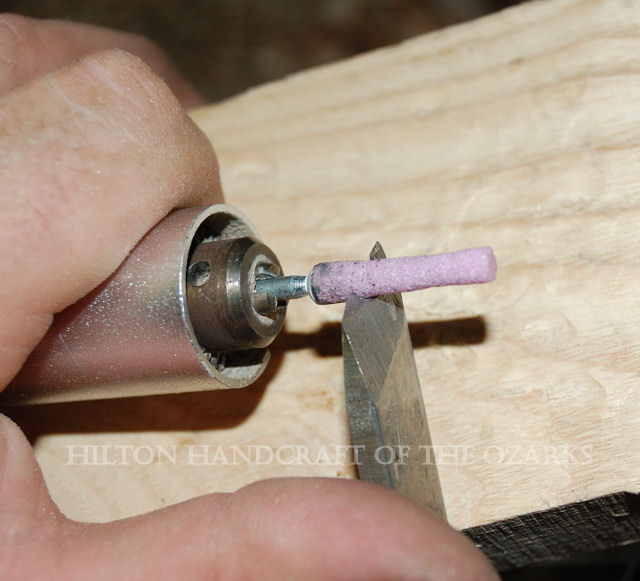
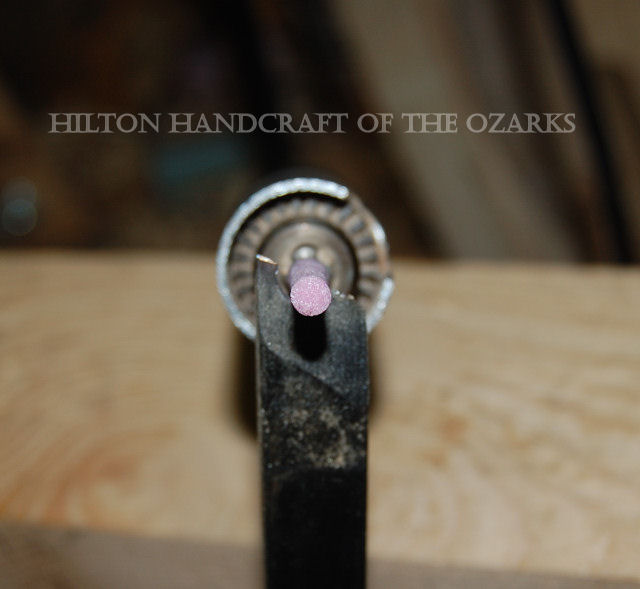
Go next to a rotary tool ... this one shown is a carving tool but you can use a dremel type of tool or something else that will hold a stone/bit/etc. you're wanting to use. Shown in this picture is a tungsten carbide cutter designed for working hardened steel. It's also a good size diameter for rings. The thickness (diameter) of the cutting tool determines the size of the captured ring you'll end up with on the wood. You can see that the nick from the grinder before has been replaced with a nice half-round shape on the end of the skew. Only go to half-round and not over that. Past that and you'll not get a good round shape for your captured ring .... you'll get a 2 flat-sided captured ring instead. |
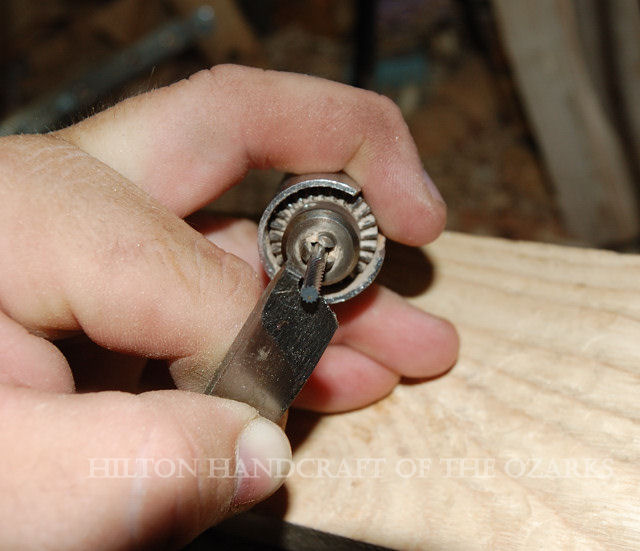 |
Another view of working that cutter into the end of the skew. Be very careful doing this. The reason I used a grinder at the beginning was so that this cutter wouldn't 'skip' across the edge of the skew when starting. Having that nick there let me easily keep that cutter in one place. |
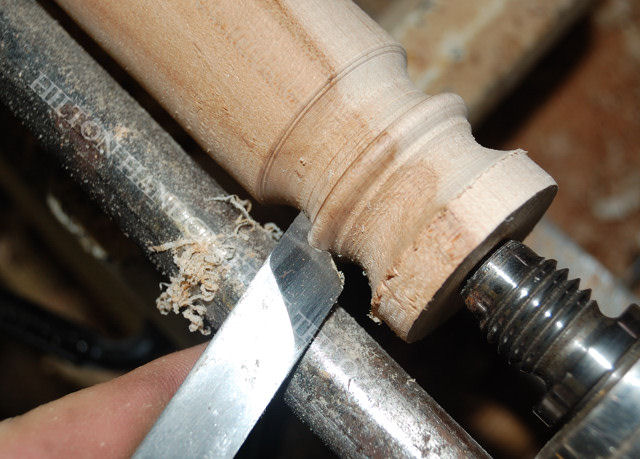 |
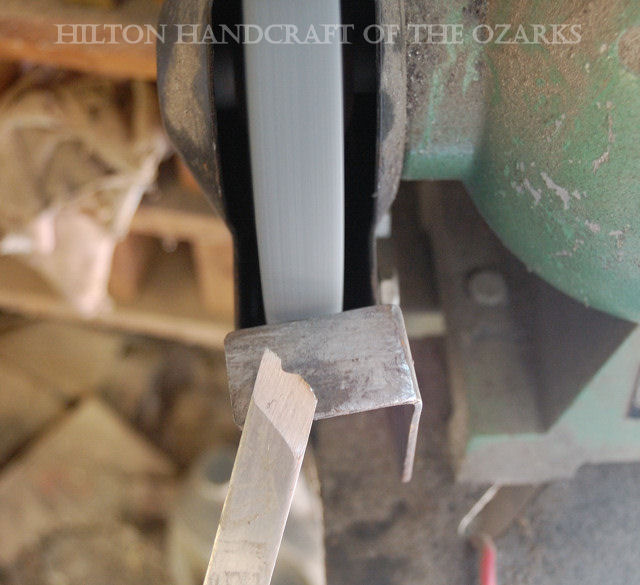
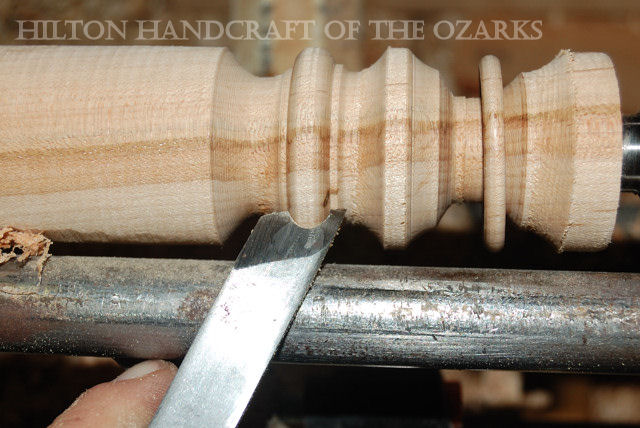
And using it. Wait!?!???!!! That's
it? Yep. That's all there is to it. I said
it was very easy, didn't I? This is a scraper. As such, it's used with the tip slightly 'down' or lower than the handle. |
 |
Working the left side of the ring ... progressively working that tip further and further in until you get to the "backside" of the ring. Once there, and you think that you have a good-shaped ring on that side .... |
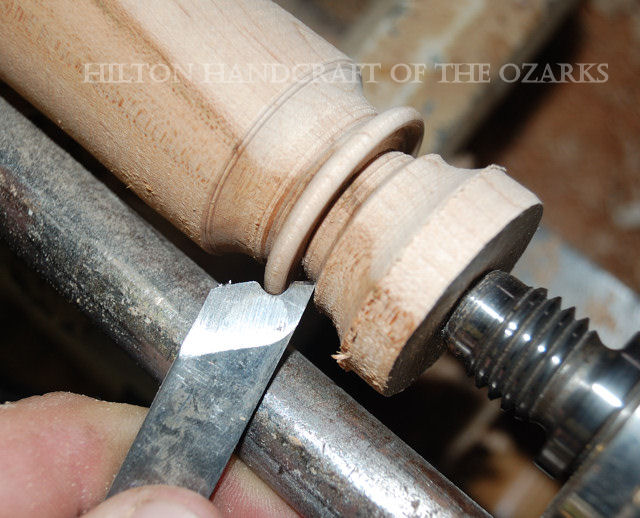 |
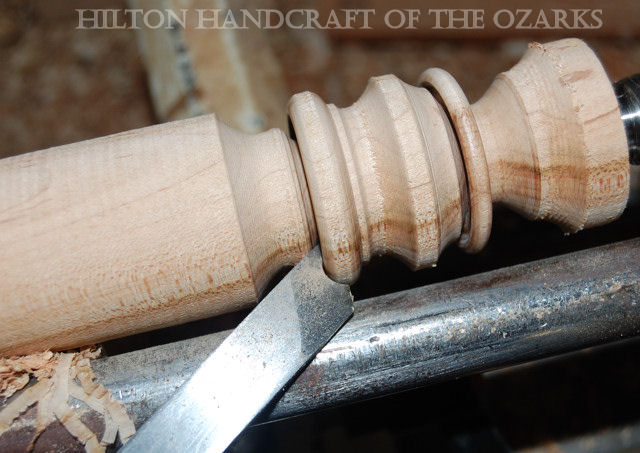
Flip over the tool and work the right side just as you did the left side. Once you get deep enough, you'll get to the "backside" from the right side and mate-up with what you did from the left side. The ring will pop free and (normally) stop spinning as the wood continues underneath it. |
 |
OK. Let's make a little larger one for
making a little larger captured rings. By "larger" I
mean that the thickness of the wood ring is bigger. The
diameter or circumference of the wood ring won't be
bigger ... that has no bearing on the tool. Just the
thickness of the ring. You'll see in later pictures ...
trust me. So, as I said, this one is going to be a little bigger. That requires a larger diameter "cutter" to make the half-round. Well, I didn't have a larger tungsten-carbide cutter so I just used a chainsaw sharpening stone. |
 |
Work that stone down into the edge of the skew until you get a half-round profile in the skew. Remember .... NO MORE than half-round. Use whatever cutter, stone, drill bit, etc. that you'd like for the size you need. |
 |
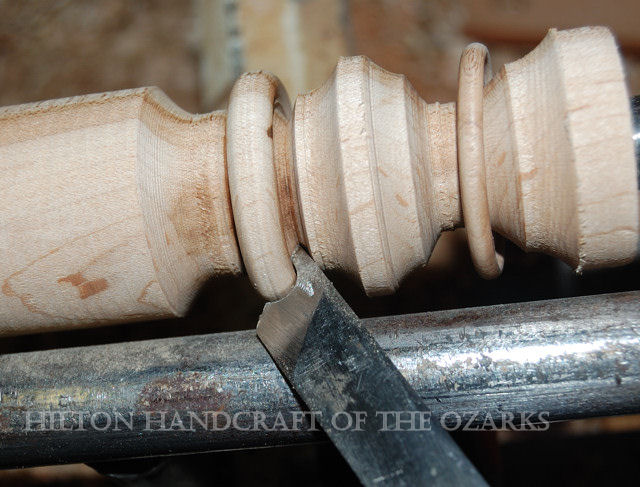
Using this larger one .... |
 |
Form the outside of the captured ring. |
 |
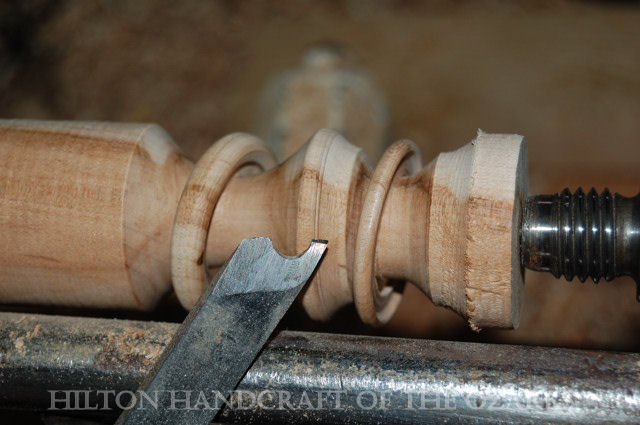
Working the left side and underneath. |
 |
Flip the tool over and then working the right side and underneath. |
 |
Done. |
| A little bit of analysis ... Why use a skew? A skew is the perfect base shape because of the bevels on both sides of the tool (so that you can use it for both left hand and right hand sides just by flipping it over). Again, WHY a skew? What a captured ring tool really is is just a scraper. More specifically, it's a negative rake scraper. More about negative rake scrapers here. The bevels of the scraper automatically define this as a negative rake scraper. OK. So why the negative rake scraper? Basically, it's less likely to bind in such a tight place as the backside of the captured ring. Also, as noted above, it allows one tool to work both left and right sides. Why is the half-round profile placed on the skew where it is? You want to leave just a little bit of the tip (the 'toe' of the skew) intact so that it has enough of an edge to cut (scrape, really) as you work the backside of the captured ring. Moving that half-round profile to the middle of the skew cutting edge is fine ... but you'll have to waste more wood behind the captured ring as you work back there.
|