So, one day I get a phone call. It's a friend of a good client of
mine with a request. She wants something unique for her new restaurants
in the Memphis, TN area. Her friend (the former client of mine),
knowing of my "uniqueness" in woodturning suggested that she contact
me. Well, we got to talking ... and talking .... and talking about what
she was looking for and I came to find out that she also would like to
incorporate something into her restaurants from her Grandfather who, nicely
enough, taught her how to cook. She had saved some old lumber and beams
from his family farm dating back into the 1800's. Great luck! I
took a look at the beams and found that they would work wonderfully. So,
we decided on a large peppermill with several more smaller peppermills that
will actually get used on a daily basis. The big one is destined for
display although it'll be fully functional and ready to be used when those
really big parties need it! And now I'm chronicling the process.
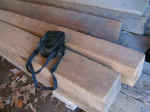 |
This is how it started. A few big beams
from an old barn. These had obviously been hand hewn.
I'm told that they were made at least 95 years ago.
They were about 6" x 6" x 15'. Quite heavy and dry
too. I had to cut off the ends a few inches to find
some really good solid wood to start from but after
that, everything was fine. I cut 5' (feet) off and took
it into the shop. |
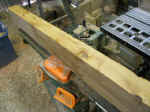 |
First, I chose a fairly straight side
and ran it through the jointer until it was flat. Then
flip it 90 degrees with the flat side against the
fence. Run it through until that new side is flat and
at a right angle to the first flat side. |
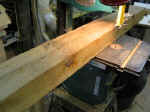 |
Being so big, I then took it to the
bandsaw and cut the beam down to just a little over 3.5"
wide. At this point, I then took it to the planer and
planed down those cut sides down to exactly 3.5" wide.
Remember, 2 of those sides were jointed flat. I didn't
plane those, you know. I guess I could have. But why?
Why not? I don't know. Why are you asking? Ummm ...
never mind. |
 |
There's lots of different ways to make a
hole down the middle of a normal peppermill blank. But,
then again, this isn't a normal peppermill blank. It's
5 feet long ! Sure, you could use an extension
(or a few dozen) for that Forstner bit but drilling
through 5 feet (!) isn't easy (yep, I've tried ... don't
ask why) and bit wander is a major problem. You'll be
lucky to get an exit hole anywhere near the end of the
blank most of the time. "Hey, don't keep us in
suspense, Andy!"
OK, here's a fairly quick and easy way to do it.
The problem is that it makes a line right down the
middle of the blank. You can hide this line or use
it as an accent but if you're really careful, it's quite
unnoticable. Let's see the process...
|
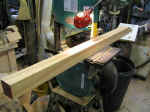 |
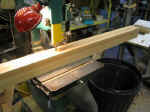
First, I chopped off about 5 inches off
of one end. This will become the top of the completed
mill. We don't want to put a large hole through the
center of it. We'll put a smaller hole in it with a
regular bit later when we start turning it.
Cut the 3.5" x 3.5" x 5' block of wood down the
middle of one side. Do this carefully and as
straight as you can. This will waste as little
wood as possible.
|
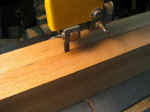 |
The mandatory close-up shot. Wow, neat,
eh? Hey, here's something ... Notice the round blade
guide on the side? Do you know what that is made from?
It's Osage Orange. It's very hard but doesn't wreck the
blade if they touch. Much better than the steel ones
that came with the bandsaw. And I can make more as
needed ... although I haven't had to for years. Now
back to the regularly scheduled article ... |
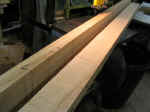 |
The Red Oak block cut apart down the
middle now. |
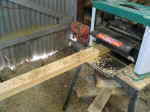 |
Very lightly plane the just cut sides.
You don't want to take too much off in order to keep the
grain match as close as possible. |
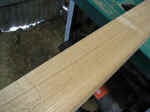 |
This isn't good enough. Those rough
spots will cause problems later on. It just won't glue
up well enough to really hide the seams. Plane it just
a weeeeeee bit more. |
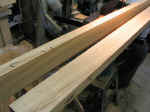 |
All ready to go on to the next step.
"Hey, Andy! Aren't those cracks I see in the wood?"
Why, yes, they are. How observant of you. I saw those
too. Amazing, isn't it, that after 90+ years Red Oak
STILL cracks. I hate Red Oak.... with a passion.
Not only for the cracking but it would be enough I
think. Absolutely no cracking was visible or suspected
from the outside 3.5" square block. But you cut into it
and there it is. Amazing. Well, it's not a deal
breaker. Those cracks aren't a big problem unless they
get much bigger. We'll see what becomes of them later
on in the process and deal with it, if need be, at that
point. |
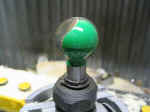 |
This is a round router bit about 1"
wide. It'll make a round (actually half-round) groove
in the wood. You don't necessarily need it round. It
could just as well be a square groove or whatever you
want. Don't make it the total hole diameter (1/2" deep
for each side piece) more than 1". You'll see why
later. It has to do with the diameter of the peppermill
mechanism that will fit into the bottom of this wood
blank. If you get that hole over 1", it'll be a sloppy
fit later. |
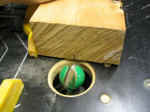 |
Mark a centerline on both halves and put
those cut sides face down on the router table. What
you'll do is route down the center of it. |
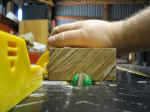 |
Raise the bit up so that only half of it
will go into the wood. You'll route a half-round down
the center. |
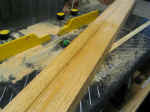 |
This is what you'll get. Yeah, I know
the color of the wood is messed up. I spritzed part of
it with water so that it'd show up better. Of course,
it didn't. Live and learn, eh? |
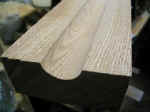 |
Another mandatory close-up. Nothing
earth-shattering here. No incredibly insightful
commentary on this picture. Just a round groove down
the middle of some Red Oak. Kinda looks like a sideways
"C" though, right? That's not interesting. Oh well, it
can't all be Shakespear or Twain. Ever notice that the
really big literary people are all recognized by just
their last names? What, like there's no big, important
Bubba Shakespear or Mary Twain writer out there?
Sorry, it must be the Red Oak dust ... |
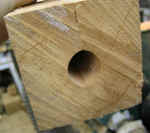 |
Well, maybe it's that nasty Red Oak dust
but that's not a very round hole! This hole will
certainly work. No problem. You just need enough of a
hole to fit the Peppermill mechanism shaft and some
peppercorns in there for it to work just fine (and with
5 feet, there's going to be no small amount of room in
there for enough peppercorns!). What happened, is that
the router bit wasn't raised high enough. Just a
smidgen off. Let's raise that up a bit and run them
through again. |
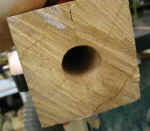 |
Ahhh, much better. A round hole that
actually looks round! Just imagine the possibilities.
Like I said above, it doesn't really matter. It just
looks better here. Later on, you'll see that we're
going to re-make this hole on the lathe. Not the entire
length of it, mind you. Just about an inch or two on
both ends |
